Thursday, November 5, 2015
Free Wood Textures for Digital Design from Graphic Stock | How to Make a Textured Stamp

Hey everyone! Today I have another fun resource from my friends over at Graphic Stock. For those of you who don't know who they are, they are an image stock company & have thousands of wonderful graphics for designers., photographers, businesses, & DIY'ers. Today I am sharing some of the ones I use most in my designing: Wood Textures!
I LOVE using rustic wood textures in my art & design (if you haven't noticed, haha!)
The above graphics can be located and downloaded by following the corresponding numbers on the image, with the ones in the list of links below:
To download the ones in this collection, you will have to sign up for a 7 Day Totally Free Trial with Graphic Stock, where you can download up to 20 images a day. If you don't want to be enrolled in the paid "unlimited download" membership, simply cancel before your seven day trial is up.
To start your seven day free trial, go HERE.
If you want to just go ahead and sign up for a membership without the free trial, I have a 80% off discount code for you HERE.
Again, if you do not want to use Graphic Stock past the free trial, PLEASE cancel your subscription so you won't have to pay for the membership.
Now for a fun tutorial on how to use these wood texture graphics in your digital design:
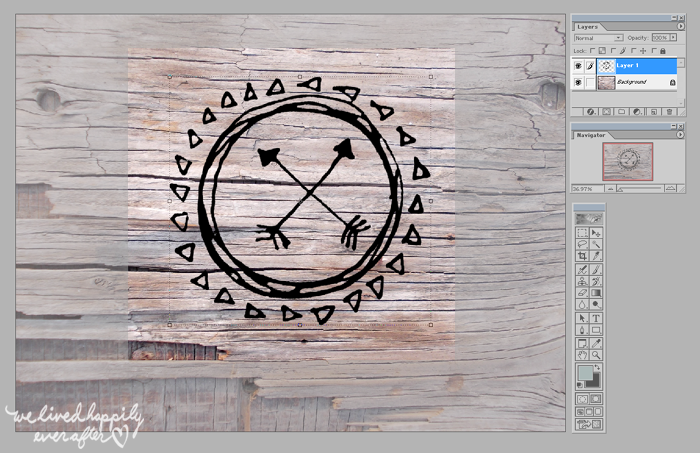
1. Paste your desired graphic on top of your texture.
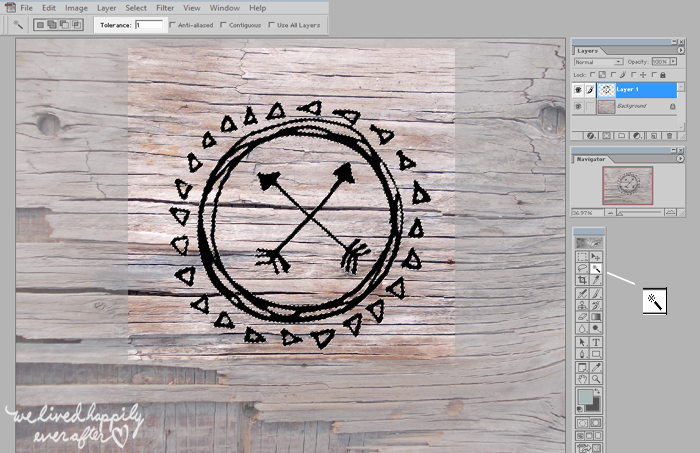
2. Using the Magic Wand Tool, select the graphic you want to use as a stamp. You can always adjust the tool's sensitivity by making the "tolerance" higher.
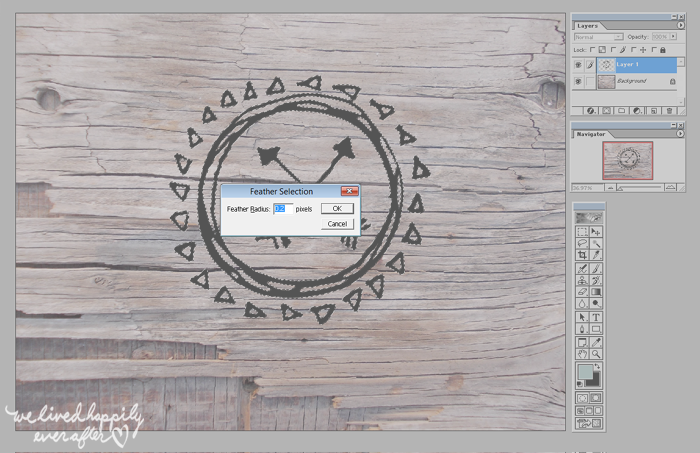
3. I like to feather my selection anywhere from 0.2 - 3% to do this, right click your selection and select "Feather" and plug in your desired percentage. Feathering makes sure that your selection is smooth, with no jagged lines.
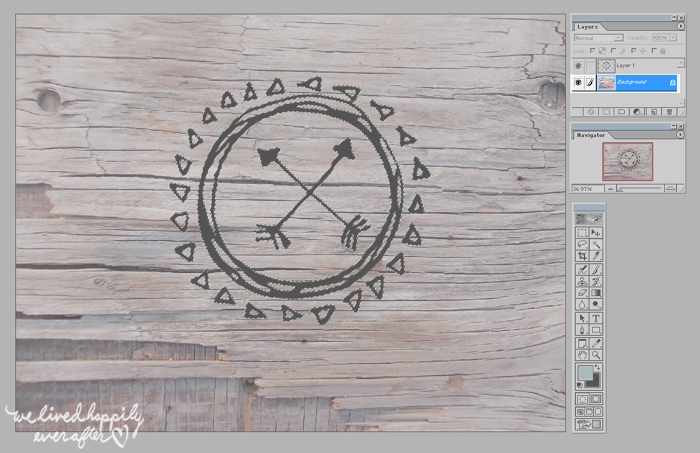
4. Press CTRL C to copy, and CTRL V to paste.
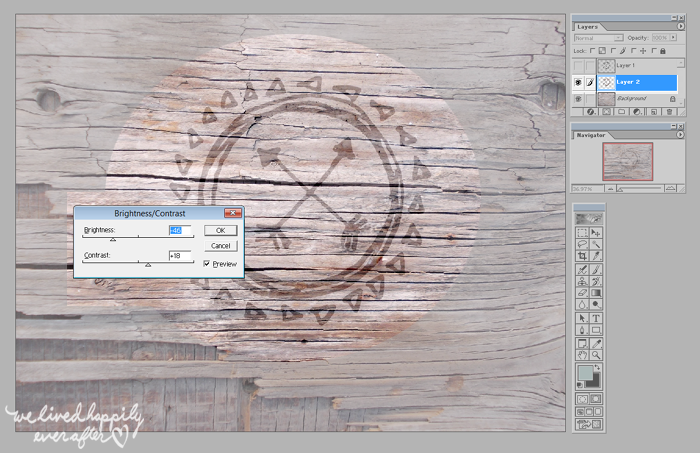
5. It will look like you didn't do anything, but notice how you now have a new layer? It just blends in perfectly. So we need to adjust the contrast. Select the newly pasted layer & go to the top tool bar click Image>Adjust>Brightness & Contrast. Play around with the levels until you have the contrast you want, press save & you are done!
You can use it as an additional layer to the original texture as shown in the first image, or as an individual "stamp," as shown above.
I just LOVE adding textures to my designs. You can also combine several different ones by lowering the opacity so the one beneath it shows though.
Another great thing about using images from Graphic Stock, is that they are all free to use commercially, which is huge when you are a designer. Well there you have it! Have fun creating!
This post was sponsored by Graphic Stock, and affiliate links are included. All opinions are my own, because I only promote things that I love and think you will love too! :)
Subscribe to:
Post Comments (Atom)


No comments:
Post a Comment