Thursday, November 5, 2015
How to Edit Baby Pictures Like a Pro Using Picmonkey


Update: Now Picmonkey charges for some of their actions, but there is a free website called Ipiccy that has identical software.
I own Photoshop, but I actually prefer the simplicity of Picmonkey! Plus, most of the actions are free & it's so simple anyone can use it!
Today I am going to show you how you can make you baby photos (or really any photos) shine using this free software. One note: I have found that sometimes using this software compared to Photoshop decreases the pixels and thus the quality of your image, so keep that in mind if you want a super high quality photo.
Here is the Photo I started out with. Cute, huh? Well, we're going to make it cuter!
Quick Note:
I circled or highlighted every important move or action I made in pink (just in case you didn't notice ;) The pink box on the left side of the pictures will be where to find the particular effect I am using in each step.
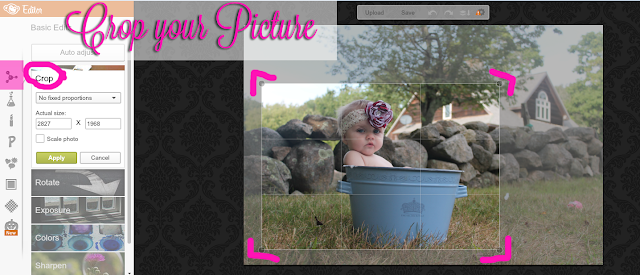
So, first off, I cropped my image.
I wanted my picture to be lighter. I love using Curves for this. It gives pictures a pure creamy source of soft light & it is so easy to control and get the tone you want.
Next I wanted to sharpen my image a bit, so I used Eye Brighten around the main focus of my image. I prefer this tool over the Sharpen Tool Because you can control what gets clear and what stays blurred.

This is a close up of what she looks like after using Eye Brighten to sharpen her face.
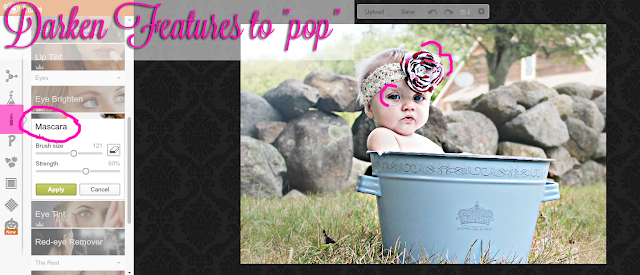
I like to sharpen her dark features (bow & eyes) with Mascara just to make them stand out a little more.
Now I used Exposure to give more contrast (lighter lights and darker darks) I played around with the shadows & brightness until I liked it.
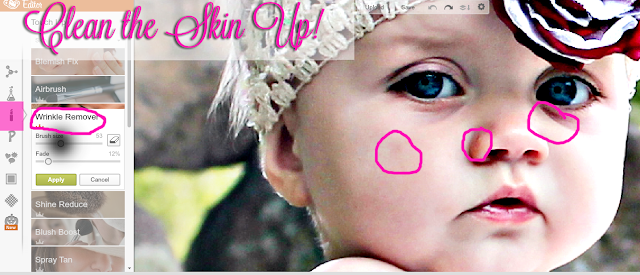
Now I cleaned up her skin (bug bites!) using Wrinkle Remover, because I am picky like that! :P
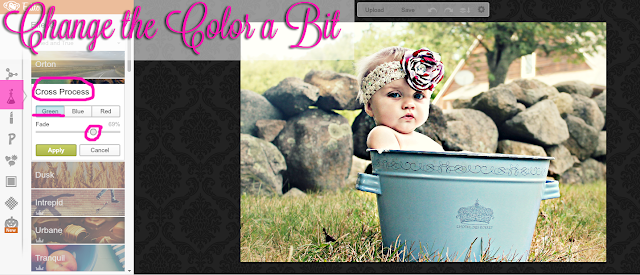
Next I used Cross Process to change the tint of the picture to a more creamy green. I faded it to about 70% so it would be very subtle.
Here's the before and after. It all comes down to your preference. Some people like the antiqued look and some like natural. I like a combination of them!
Using Curves again (my favorite ;) I used the color override to dilute it. Before I "applied" the action,
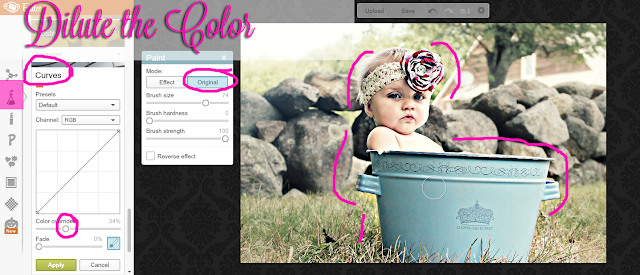
I erased where I wanted all the color to be so it would pop more.
Call me crazy, but I like my pictures to be as clean as possible, so I used Clone to replace this ugly leaf in the grass with more grass.
All better!
There you have it! all The steps might look insignificant until you see the before and after! :)
It's all about playing around with your picture until you like what you see!

If you haven't tried Picmonkey out, you really should! Ever since Picnik closed, it has been the best free photo editing site I have found!
Thanks for stopping by!
Subscribe to:
Post Comments (Atom)


No comments:
Post a Comment