Thursday, November 5, 2015
Transfer your Writing, Drawings & Doodles into Chalkboard Graphics & Printables Using Photoshop!

I've had so many of you ask me to do tutorials on how to work with chalkboard backgrounds in Photoshop, and I've been working really hard developing some awesome new hand drawn digital graphics that I'm going to be sharing with you all soon. Ever try "drawing" or "painting" in paint? The result usually makes me look like I have the skills of a two year old.... Drawing by hand is SO much easier! Today, I wanted to show you how you can convert your drawings into digital graphics. It's really easy, promise!

First, I usually sketch out my ideas in pencil, go over them with a pen and then erase the pencil.
Then I scan (or photograph) my creation and upload it onto my computer.
Now for the Photoshop side:


To find the Brightness/Contrast tool go to Image -> Adjust -> Brightness/Contrast. You basically want the white to be really white, and your drawing to be really dark & black.

To find the Saturation tool go to Image -> Adjust -> Saturation.

If all your drawing lines don't intersect or touch, you may need to hold down the SHIFT button while selecting all the different parts of your drawing. If you make a mistake while selecting (like accidentally selecting the white instead of the black) you can always press CTRL Z to "undo" your previous action (can't tell you how much I use that one!)
One HUGE tip: if your "Magic Wand Selection Tool" isn't picking the whole drawing (as in all connected lines), then make your tolerance higher (like to 100.) Or if it is selecting too much of your photo (for example if it selects both white and black) the lower the tolerance below 10. You can find the tolerance option in the upper left in the above photo. Mine was set to 3.

Make sure to hide the background layer by pressing the eye next to it. This will allow you to save your image with a transparent background.

Now we are changing our sketch to white.

This step is to ensure that we get rid of any non white tones that we may have selected.
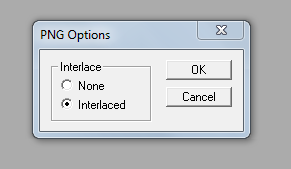
Now save your image as a PNG image. This will ensure that it has a transparent background.

Now you can open up your background (like my Free Chalkboard Download, found HERE) and paste your sketch on top of it. You can use this process to transfer a complete drawing, or you can copy and paste a combination of different doodles you have come up with (like I did in my "Little Bit of Everything" example at the bottom of this post)

I don't like fake looking chalkboard compositions made up with computerized lettering- because chalkboards are supposed to be a little imperfect and have a hand written aspect to them.
But if you use the right font (like these downloadable hand written fonts I have HERE) you can easily combine the hand drawn with your digitized graphics to make a lovely chalkboard printable.

This is a graphic I developed using a combination of chalkboard embellishments I've come up with.
I am in LOVE with it! "Little Bit of Everything" is one of my husband's favorite songs... so I'll probably print this one out an put it up on the wall.

Be on the look out for the free downloadable graphics I'm going to be sharing soon!


To see how to use your new graphics in Photoshop or Picmonkey, see my tutorial HERE.
To see how to add color in-between the lines of graphics in photoshop, go HERE.
Need a chalkboard background for your masterpieces? Go HERE or HERE! To see how to change the color of the graphics in Picmonkey, see this post HERE.
Subscribe to:
Post Comments (Atom)
No comments:
Post a Comment